

Introduction
Planning the New Zealand South Island 7-Day Campervan Route? You’re in for the road trip of a lifetime. The South Island is one of the most stunning places on earth, with jaw-dropping landscapes that range from glacier-carved valleys and turquoise lakes to fjords, rainforests, and golden beaches. And there’s no better way to explore it all than from the comfort and freedom of a campervan.
This epic 7-day itinerary is tailored to make the most of your adventure on wheels. Whether you’re chasing mountain views in Aoraki/Mount Cook National Park, cruising through the misty wonders of Milford Sound, or sipping wine in Queenstown, this route brings you face-to-face with New Zealand’s finest natural beauty—all while giving you the flexibility to sleep under the stars, stop for spontaneous photo ops, and enjoy your own schedule.
New Zealand Road Trip
In this guide, we’ll walk you through the ultimate 7-day South Island campervan itinerary, including daily travel plans, must-see stops, where to park your camper, what to pack, budgeting tips, and much more. This is your go-to resource for creating an unforgettable road trip through one of the most awe-inspiring regions on the planet.
So buckle up, fuel up, and let’s hit the road—because your New Zealand South Island 7-Day Campervan Route adventure starts here.
New Zealand South Island 7-Day Campervan Route
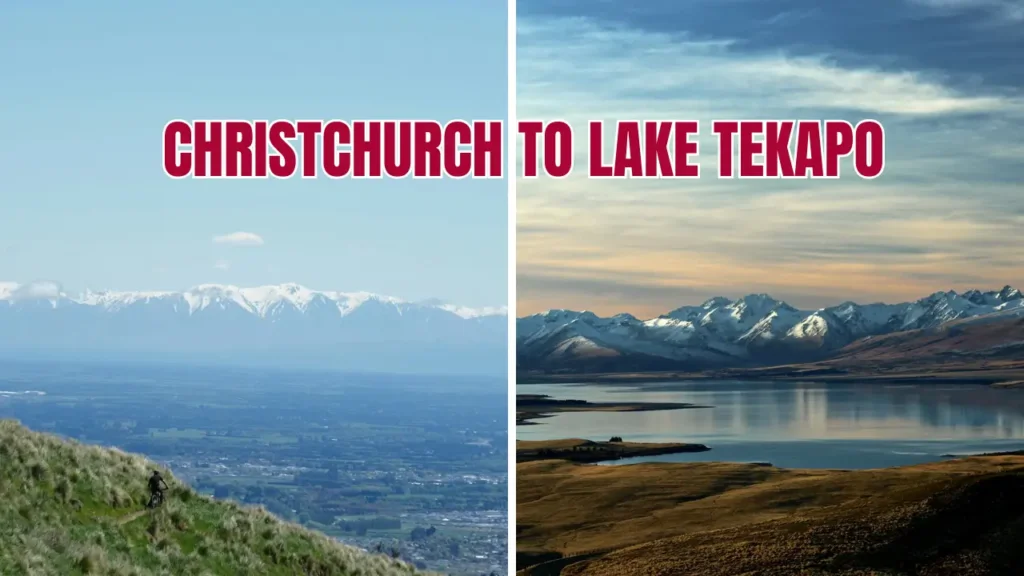
Day 1 – Christchurch to Lake Tekapo
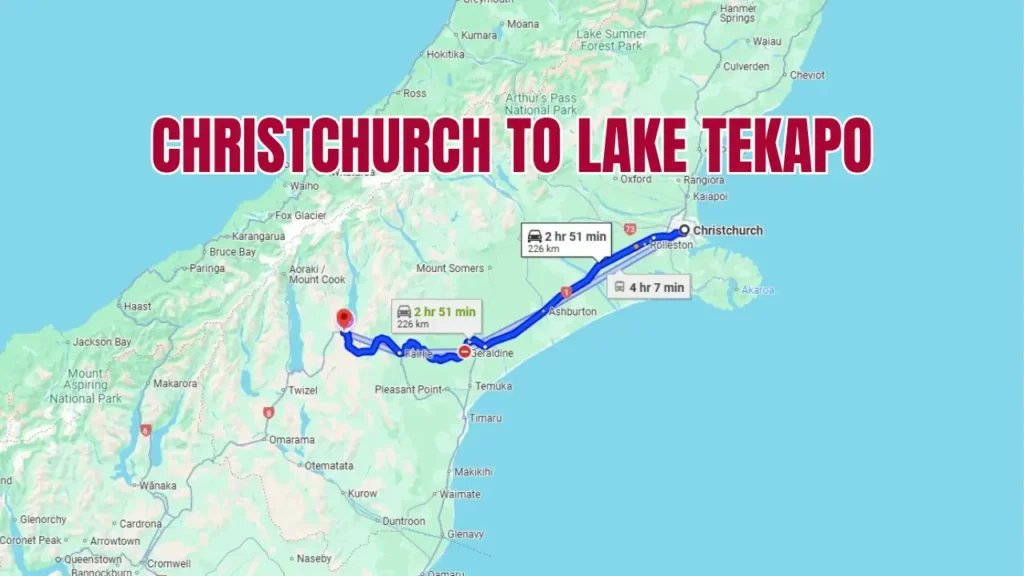
Source: Google Map
Pick Up Your Campervan and Stock Up
Your New Zealand campervan adventure begins in Christchurch, the largest city on the South Island. First thing’s first—grab your campervan from your chosen rental agency. Most companies like JUCY, Britz, or Maui have pickup locations near the airport or in the city. Aim to pick it up early in the day, as you’ll want plenty of daylight to reach your first destination: Lake Tekapo.
Before hitting the road, stock up on essentials. Head to Pak’nSave or Countdown supermarkets in Christchurch to fill your fridge and pantry. Pick up non-perishables, water, toiletries, and road trip snacks. Don’t forget a local SIM card or mobile hotspot for navigation and communication—coverage can get spotty in remote areas.
Check the campervan thoroughly—tyre pressure, gas bottles, kitchen equipment, and bedding. Once you’re fueled and ready, set your GPS for Lake Tekapo, about a 3-hour drive southwest.
Scenic Drive to Lake Tekapo
The drive from Christchurch to Lake Tekapo is where the magic begins. You’ll pass through lush Canterbury plains, with the Southern Alps looming in the distance. The trip itself is part of the experience, with changing landscapes keeping you constantly entertained.
Take State Highway 1 to Geraldine, then switch to SH79 and SH8 toward Lake Tekapo. Along the way, you’ll pass charming small towns like Fairlie—great for a coffee stop or picking up a famous Fairlie Bakehouse pie.
As you get closer to Lake Tekapo, the terrain starts to shift. The rolling hills flatten into glacial valleys, and the vivid turquoise water of the lake comes into view—a jaw-dropping sight you won’t forget.
Key Stops Along the Way
- Rakaia Gorge: Optional detour for stunning river views and a picnic stop.
- Geraldine: Grab fresh produce, local crafts, or a sweet treat.
- Fairlie: Home to one of NZ’s most iconic meat pies.
Where to Park and Stay Overnight
Once in Lake Tekapo, settle into one of the local holiday parks. Recommended options include:
- Lake Tekapo Holiday Park: Right on the lakefront with powered sites.
- Lake McGregor Reserve (freedom camping): Ideal if you’re self-contained.
Wrap up the day with a walk to the Church of the Good Shepherd for sunset photos, then look up—Lake Tekapo is part of the Aoraki Mackenzie International Dark Sky Reserve, making it one of the best stargazing spots on Earth.
Day 2 – Lake Tekapo to Mount Cook
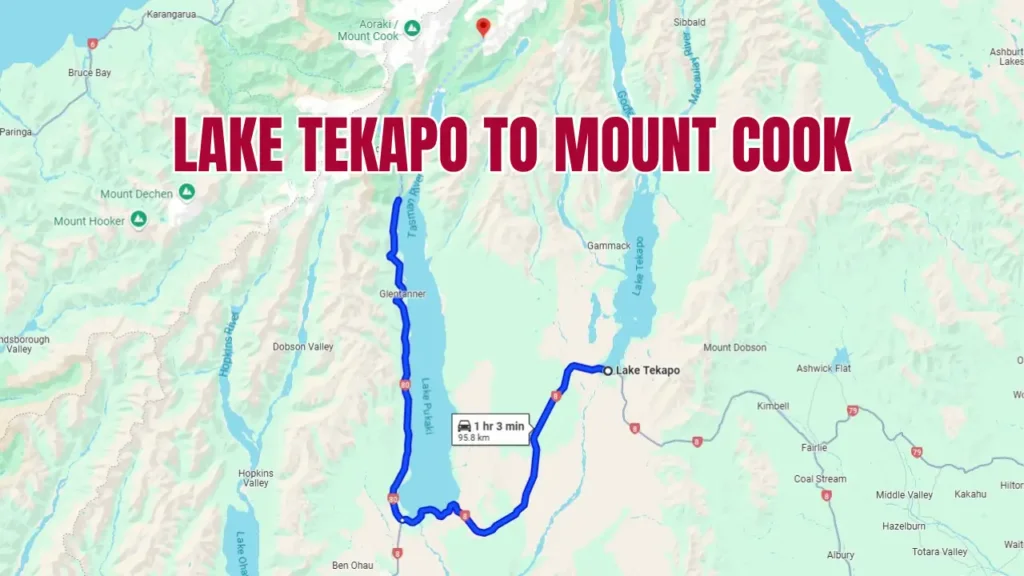
Source: Google Map
Exploring Lake Tekapo in the Morning
Start your morning with a sunrise over the lake. The early light reflecting off the water and mountains creates a pastel wonderland. Grab a coffee at the Astro Café atop Mount John (if open)—arguably one of the best views in New Zealand.
If you have time, soak in the Tekapo Springs hot pools before hitting the road. The views from these geothermal pools are unforgettable, especially in the morning mist.
Drive to Aoraki/Mount Cook National Park
From Tekapo, head west along SH8, then north via SH80 to Aoraki/Mount Cook National Park. This 1.5-hour drive skirts the edge of Lake Pukaki, where the glacier-fed water looks like blue Gatorade. Pull over at one of the many viewpoints—this is not a drive to rush.
As you approach Mount Cook Village, the dramatic landscape unfolds in front of you. Snow-capped peaks, braided rivers, and alpine wilderness set the stage for your time in New Zealand’s highest mountains.
Hooker Valley Track Hike
Once parked, stretch your legs with a hike on the Hooker Valley Track. This 10km (round-trip) trail is flat, family-friendly, and offers show-stopping views of Mount Cook, swinging suspension bridges, and glaciers. Pack a lunch and enjoy it with a view of Hooker Lake and its floating icebergs.
The walk takes 3–4 hours, depending on your pace. It’s one of the most iconic hikes in New Zealand—and rightfully so.
Campervan Campsites in the Area
You can camp right in Mount Cook Village:
- White Horse Hill Campground: DOC site with basic facilities, nestled under the mountains.
- Glentanner Park Centre (20 minutes away): Offers powered sites and hot showers.
Cook dinner under the stars with views of the Southern Alps. If weather permits, you’ll experience a dazzling night sky away from city lights.
Day 3 – Mount Cook to Wanaka

Source: Google Map
Morning in Mount Cook
Wake up early and sip your morning brew with a front-row seat to the sunrise over Mount Cook. If you’re feeling adventurous, consider a scenic flight or heli-hike (if budget allows). These excursions give you an unforgettable aerial view of New Zealand’s alpine heart.
Check out the Sir Edmund Hillary Alpine Centre for history buffs—Hillary trained here before climbing Everest.
Drive Through Lindis Pass
Today, you’ll drive roughly 3.5 hours to Wanaka. From Mount Cook, retrace your route to Lake Pukaki, then head south along SH8 through Twizel and Omarama before climbing over the stunning Lindis Pass.
This high mountain road (971m elevation) offers dramatic scenery—golden tussock plains, sharp ridgelines, and wide valleys. Stop for photos at the Lindis Pass viewpoint; it’s especially breathtaking in winter with snow-dusted peaks.
Must-See Stops: Omarama Clay Cliffs, Lindis Valley
- Omarama Clay Cliffs: Just off the highway, these towering rock formations look like they belong on another planet.
- Hot Tubs Omarama: Recharge in your own private tub surrounded by mountains.
Take your time descending into the Central Otago region toward Wanaka. The shifting landscape is like nature’s movie reel.
Evening in Wanaka – Where to Eat and Camp
Arriving in Wanaka feels like a warm hug. Nestled beside a pristine lake and backed by mountains, this laid-back town is a traveler favorite.
- Eat at: Big Fig (slow-cooked meals), Red Star Burger, or Rhyme & Reason brewery.
- Stay at: Wanaka Lakeview Holiday Park or freedom camp at Albert Town (self-contained vans only).
Don’t miss a sunset stroll along the lakefront, with views of the iconic #ThatWanakaTree leaning gracefully from the water.
Day 4 – Wanaka to Queenstown

Source: Google Map
Sunrise at Lake Wanaka & #ThatWanakaTree
Start the day early with a sunrise walk along the lake. The famous #ThatWanakaTree is best seen in the golden hour, reflected perfectly in the still morning waters.
Grab breakfast at a local café before hitting the road. If you’re feeling fit, a quick hike up Mount Iron (1.5-hour return) gives panoramic views of Wanaka and the surrounding valleys.
Drive to Queenstown via Cardrona
Today’s route to Queenstown is short (just over an hour), but packed with highlights. Take the Crown Range Road—the highest main road in NZ. Stop at:
- Cardrona Hotel: NZ’s most photographed pub. Great for a coffee or pint.
- Bendigo Goldfields: For a detour into old gold-mining ruins.
The descent into Queenstown offers jaw-dropping views over Lake Wakatipu. Have your camera ready.
Activities in Queenstown
Adventure capital of the world? You bet. Pick your thrill:
- Bungy jump, jet boat, or skydive
- Scenic gondola ride and luge
- Wine tasting in Gibbston Valley
If you’re not into adrenaline, relax by the waterfront or take a stroll through Queenstown Gardens.
Campervan Camping Near the Town
Queenstown can get busy, so book in advance:
- Queenstown Lakeview Holiday Park: Central and convenient.
- 12 Mile Delta (DOC site): Rustic, lakeside camping 15 minutes from town.
End the night with Fergburger—legendary for a reason—or enjoy a lakeside drink at Perky’s floating bar.
Day 5 – Queenstown to Te Anau
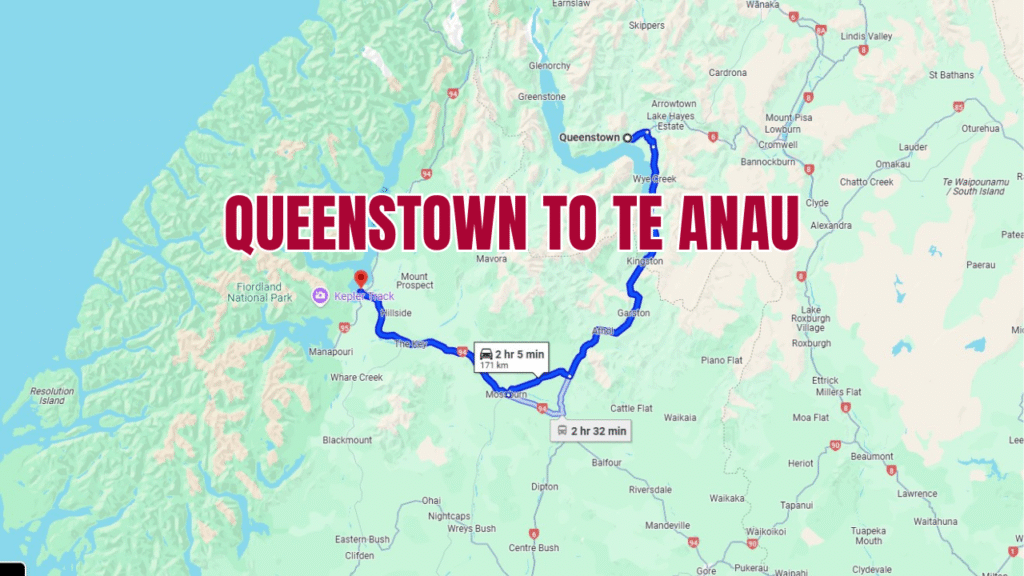
Source: Google Map
Morning Adventure or Relax in Queenstown
If you missed any must-do activities, squeeze them in before departing. Queenstown has an irresistible energy—it’s easy to fall for its charm.
Pick up a pastry from Bespoke Kitchen or grab last-minute supplies for the next leg of your journey.
Drive to Te Anau – The Gateway to Fiordland
The drive to Te Anau takes about 2 hours and winds through lush farmland and along the shores of Lake Wakatipu. Stop at Devils Staircase viewpoint for dramatic photo ops.
You’ll reach Te Anau in the early afternoon—a peaceful lakeside town that serves as the perfect base for Fiordland adventures.
Best Places to Park and Sleep
Te Anau is campervan-friendly, with several excellent sites:
- Te Anau Lakeview Kiwi Holiday Park
- Fiordland Great Views Holiday Park
If you’re self-contained, there are freedom camping spots around the lake, but check signage—rules are strictly enforced in this region.
Te Anau Glowworm Caves Optional Tour
Want a magical evening? Book the glowworm cave tour. It starts with a catamaran ride across Lake Te Anau, followed by a guided tour through limestone caves lit by thousands of glowworms. It’s like stepping into a galaxy.
Wrap up your fifth day with a lakeside sunset, hearty meal, and a warm sleep before the most scenic drive of your trip tomorrow: Milford Road.
Day 6 – Te Anau to Milford Sound and Back
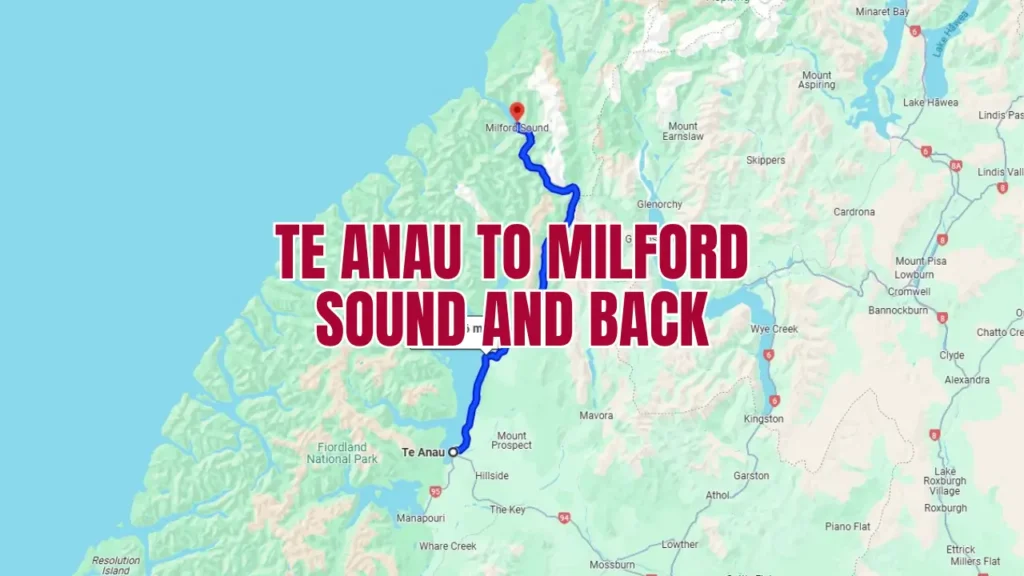
Source: Google Map
Early Start for a Scenic Drive
Set your alarm early—this is the day you’ve been waiting for. The journey from Te Anau to Milford Sound is about 2 hours each way, but you’ll want extra time for all the jaw-dropping stops. Leave by 6 or 7 AM to beat the tour buses and enjoy the calm of the morning mist on the fjords.
The road to Milford Sound (State Highway 94) is one of the most scenic drives on the planet. Waterfalls, snow-capped peaks, lush beech forests—it’s like driving through a movie set. The road curves, climbs, and dives through Fiordland National Park, so drive cautiously and take your time.
Must-See Stops Along Milford Road
Take advantage of these epic stop-offs to stretch your legs and fill your camera roll:
- Eglinton Valley: Wide open plains surrounded by towering peaks.
- Mirror Lakes: Perfect reflections of the Earl Mountains on a calm day.
- Lake Gunn Nature Walk: A short but magical walk through mossy beech forest.
- The Divide: Entry to Routeburn Track and great short hikes.
- Homer Tunnel: A narrow, dark tunnel blasted through solid granite—an adventure on its own.
- The Chasm: A 20-minute loop walk showcasing powerful waterfalls and sculpted rock formations.
Each stop along the way is well-signposted and usually includes short walks, ideal for breaking up the drive.
Cruise on Milford Sound
Once you reach Milford Sound, it’s time to experience the main event. Book a 1.5- to 2-hour cruise in advance to glide through the fjord, surrounded by steep cliffs and cascading waterfalls. Most cruises take you all the way to the Tasman Sea and back, and if you’re lucky, you’ll spot dolphins, seals, or even penguins.
Some of the top cruise operators include:
- RealNZ (formerly Real Journeys)
- JUCY Cruise
- Mitre Peak Cruises
Choose a small boat for a more personal, up-close experience, especially if you’re keen on photography.
Campervan-Friendly Stops for the Night
You can either return to Te Anau or stay overnight closer to Milford Sound. Note that camping options at Milford are limited and heavily regulated:
- Milford Lodge (powered campervan sites): Book early—it fills fast.
- Cascade Creek Campsite (DOC): About halfway back to Te Anau, in a tranquil forest setting.
Remember: No freedom camping is allowed in Milford Sound. Stick to designated areas to help protect this pristine environment.
After a full day of stunning scenery and wildlife, enjoy a cozy evening in your van. Sip a hot drink, relive the day’s highlights, and fall asleep to the sound of the forest.
Day 7 – Te Anau to Christchurch (via Lake Pukaki or Dunedin)
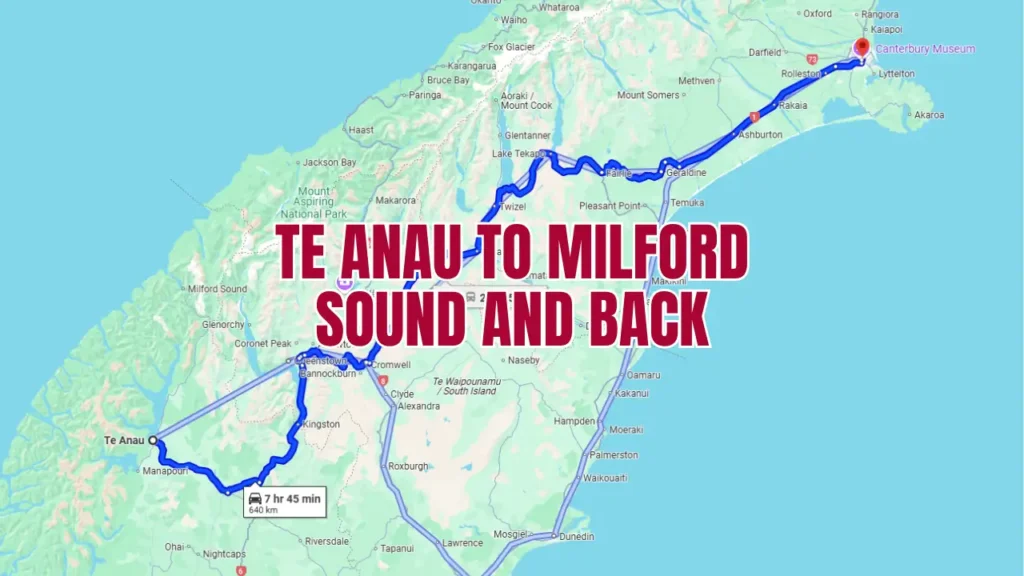
Source: Google Map
Choose Your Route Back
Your final day offers two main routes back to Christchurch, depending on your travel style:
- Via Lake Pukaki and Tekapo: Return the way you came for one more shot at the stunning alpine views. About 8–9 hours total.
- Via Dunedin: A coastal detour through Otago, rich in wildlife and architecture. Around 9–10 hours total.
If you’re short on time, the Lake Pukaki route is quicker. If you want variety, go via Dunedin.
Highlights on the Way
If returning via Lake Pukaki/Tekapo:
- Twizel: Stop for coffee or fresh salmon.
- Lake Pukaki Viewpoint: Perfect for one last mountain photo.
- Burkes Pass: Small art gallery and quirky roadside stop.
If heading through Dunedin:
- Nugget Point: Short walk to a lighthouse with epic views.
- Otago Peninsula: Amazing for spotting albatrosses and sea lions.
- Baldwin Street: World’s steepest street, if you want a challenge!
Both routes offer public rest areas and service towns for fuel and food. Keep an eye on weather conditions, especially if you’re traveling in winter.
Final Night Recommendations
Depending on your route, you can either:
- Stay overnight in Geraldine or Ashburton (Lake Pukaki route)
- Stay in Oamaru or Timaru (Dunedin route)
Choose a nearby holiday park or campground to ensure a stress-free final night.
Before returning your campervan, make sure it’s clean, fueled, and waste tanks are emptied (check your rental company’s policy). Most agencies require drop-off by late morning, so plan to arrive in Christchurch by the evening before your flight or next destination.
Returning the Campervan
Drop off your vehicle with a full fuel tank and tidy interior. Don’t forget to remove trash, leftover food, and personal items.
If you’ve got time in Christchurch, unwind with a stroll through the Botanic Gardens, grab a bite at Riverside Market, or check out the artsy laneways downtown.
This marks the end of your unforgettable 7-day South Island road trip. You’ve driven through mountains, fjords, lakes, and valleys—living the kind of freedom only a campervan trip can provide.
What to Pack for Your South Island Campervan Trip
Clothing Essentials
New Zealand’s South Island is known for its unpredictable weather. You could experience sunshine, rain, and snow—all in one day. So, packing the right clothes is key. Start with layers. Merino wool base layers are a Kiwi favorite: warm, breathable, and odor-resistant. Over that, bring a good fleece or puffer jacket for insulation. For outerwear, a high-quality waterproof and windproof jacket is a must.
You’ll also want a pair of comfortable hiking pants, waterproof trousers, and shorts for warmer days. T-shirts, hoodies, and casual wear for downtime are all essential. For shoes, a good pair of waterproof hiking boots is crucial. Throw in flip-flops or sandals for hot pools and shower blocks.
Don’t forget a warm beanie, gloves, and thermal socks if you’re traveling outside of summer. Nights can get cold—even in spring or autumn—so pack for warmth just in case.
Cooking and Living Supplies
If your campervan doesn’t come fully stocked, here’s what you should bring or buy:
- Cooking gear: Frying pan, saucepan, spatula, tongs, kettle.
- Utensils and tableware: Plates, bowls, mugs, forks, knives, spoons.
- Cleaning supplies: Dish soap, sponge, drying towel, garbage bags.
- Cooler box: Helpful for extra food storage if the van’s fridge is small.
- Reusable containers: Perfect for leftovers or lunch on the go.
Pack a decent chef’s knife—most campervan knives are dull. Consider a camping table and chairs if they’re not included, as outdoor meals with a view are a highlight of van life.
Safety and Navigation Gear
Safety is always a priority on a road trip. Include the following essentials:
- First aid kit: Stocked with basics like plasters, antiseptic, painkillers.
- Torch or headlamp: Useful for campsite tasks after dark.
- Paper map: GPS is great, but coverage is patchy in remote areas.
- Power bank: Keep your phone charged if you’re freedom camping without electricity.
Bonus tip: download offline maps from Google Maps before leaving Christchurch. They’re a lifesaver when signals vanish.
Bonus Items for Comfort
Want to elevate your experience? Consider packing:
- Portable Bluetooth speaker: Set the mood with music at the campsite.
- Books or Kindle: Perfect for slow evenings.
- Laundry bag and pegs: For organizing dirty clothes or drying towels.
- Compact vacuum or handheld broom: Keeps the campervan tidy.
- Eye mask and earplugs: Campsites can get noisy.
It’s also smart to bring your favorite snacks or condiments—rural supermarkets have limited options. With the right packing, your van becomes your home, your kitchen, and your escape pod—all in one.
Tips for Campervan Travel in New Zealand
Freedom Camping vs. Campgrounds
Freedom camping sounds romantic—and it can be—but there are strict rules. You can only freedom camp in designated areas if your van is self-contained (certified with a toilet, water supply, and waste system). Breaking the rules can result in fines.
Holiday parks are more comfortable, offering powered sites, showers, laundry, and communal kitchens. DOC (Department of Conservation) sites offer a middle ground: basic facilities in scenic spots, often with a small fee.
Plan to mix it up—splurge on a holiday park every few nights, then enjoy solitude with a freedom site.
Driving and Road Conditions
Kiwis drive on the left, and roads can be narrow, winding, and hilly. Go slow and stay alert—especially on rural roads where sheep or cyclists may appear suddenly.
Campervans are heavier and take longer to brake, especially on downhill slopes. Take it easy on mountain passes and avoid speeding. Some key tips:
- Don’t use your phone while driving.
- Always pull over for faster traffic.
- Use lay-bys for photo stops, never the shoulder.
- Check road closures or alerts at NZTA’s official site.
Internet, Toilets, and Power Access
Wi-Fi is limited in rural areas. Spark and Vodafone offer tourist SIM cards with good coverage, but don’t expect consistent service in the mountains or fjords.
Public toilets are widely available and well-maintained. Campervan parks have showers and restrooms, but if you’re freedom camping, your self-contained van’s toilet will be essential.
For power, plug into a powered site every couple of days to recharge your van’s battery, especially if you’re running a fridge or heater.
Managing Waste and Being Eco-Friendly
Traveling in New Zealand means protecting its wild beauty. Always dispose of waste at official dump stations—these are available at holiday parks and public service areas.
Recycle when possible, don’t litter, and never dump waste in nature. Use biodegradable soaps and keep water use to a minimum. Respect “no camping” signs and avoid damaging natural areas.
Following these rules isn’t just the law—it’s a way of showing love for the land you’re exploring.
Best Time to Visit South Island for a Campervan Trip
Seasonal Highlights
Each season brings its own flavor to a South Island campervan trip:
- Summer (Dec–Feb): Warm, long days perfect for swimming and hiking.
- Autumn (Mar–May): Golden foliage, quieter roads, and mild weather.
- Winter (Jun–Aug): Snowy mountains, skiing, and cozy campfires.
- Spring (Sep–Nov): Blooming flowers, baby lambs, and crisp air.
Most travelers prefer summer for outdoor activities, but shoulder seasons (spring and autumn) offer fewer crowds and more relaxed experiences.
Weather Considerations
The South Island can be unpredictable. You might wake to sunshine and end the day in a downpour. Be prepared for sudden changes—especially in alpine regions.
Always check the weather forecast before driving through mountain passes or planning hikes. In winter, snow can cause closures or require snow chains.
Mornings and nights can be cold year-round, so ensure your campervan has proper insulation or heating if you’re traveling off-season.
Events and Festivals to Consider
Time your trip with one of these local events for added fun:
- Warbirds Over Wanaka (Easter): Airshow with historic aircraft.
- Queenstown Winter Festival (June): A lively kickoff to the ski season.
- Bluff Oyster Festival (May): A treat for seafood lovers.
Check regional event calendars for what’s on—local farmers markets, music gigs, or food fests can add flavor to your itinerary.
Booking and Peak Travel Tips
If you’re traveling between December and February, book your campervan, campsites, and major activities well in advance. This is peak tourist season, and spots fill up fast.
Avoid school holidays if possible, as locals are also on the road. During off-peak months, you’ll enjoy more flexibility, spontaneous camping, and lower prices.
Plan smart, pack well, and stay flexible—that’s the secret to a magical campervan trip through New Zealand’s South Island.
Costs and Budgeting for a 7-Day South Island Campervan Trip
Campervan Rental Costs
Your biggest expense will likely be the campervan rental itself. Prices vary based on the size, amenities, and time of year. Here’s a rough idea of what to expect:
- Basic 2-berth van (non-self-contained): $50–$100 NZD/day
- Self-contained 2-berth van: $90–$150 NZD/day
- Luxury or family-size campervan: $150–$300 NZD/day
During peak season (December–February), rates can spike. Most rentals include basic insurance, but consider upgrading to comprehensive coverage—it can save you thousands if there’s damage.
Watch for hidden fees like:
- Extra driver fees
- One-way drop-off charges
- Admin or cleaning fees
- Toll or road usage charges
Pro tip: Booking early or during sales (like Black Friday) can score you significant discounts.
Daily Expenses (Fuel, Food, Campsites)
Fuel is your next big cost. Diesel is cheaper than petrol in New Zealand, but diesel vehicles require paying road user charges (RUCs), usually tacked on to your rental.
Expect to pay:
- Fuel: $100–$150 NZD total for the trip (more if doing lots of detours)
- Food: $20–$50 NZD per person per day
- Campsites:
- Freedom camping: Free (if self-contained)
- DOC campsites: $8–$20 NZD/person
- Holiday parks: $30–$60 NZD per vehicle
Save money by cooking most meals in your van. Stock up on groceries in big towns like Christchurch, Queenstown, and Wanaka—rural spots have higher prices and limited stock.
Activity and Tour Costs
Some of New Zealand’s best activities are free (hello, hiking!), but you’ll want to budget for a few epic experiences:
- Milford Sound Cruise: $70–$150 NZD
- Glowworm Cave Tour (Te Anau): $100 NZD
- Adventure sports (Queenstown):
- Bungy: ~$200 NZD
- Jet boat: ~$120 NZD
- Paragliding: ~$250 NZD
Plan for 2–3 paid activities if you’re on a moderate budget, and reserve them ahead of time if traveling in peak season.
Budget-Saving Tips
- Travel off-peak: Cheaper rentals and more campsite availability.
- Use travel apps: Rankers, CamperMate, and WikiCamps show free campsites and dump stations.
- Book multi-day campervan deals: Some rentals offer free days after a certain period.
- Fuel up smart: Compare prices using the Gaspy app.
- Use supermarket loyalty cards: New World and Countdown often offer discounts.
With smart planning, a couple can enjoy a week-long South Island campervan trip for under $1,500–$2,000 NZD, including van rental, food, fuel, and a few activities.
Top Mistakes to Avoid on a Campervan Road Trip
Underestimating Driving Times
New Zealand roads are not your typical highways. Winding mountain passes, gravel roads, and single-lane bridges mean you’ll average 60–70 km/h, not 100 km/h. Google Maps often underestimates drive times, especially if you’re stopping for photos (and you will be!).
Plan for 3–5 hours of driving max per day, and add buffer time for weather changes or unplanned detours.
Not Booking Ahead in Peak Season
From December to February, campsites and activities book out fast. Don’t risk arriving in Queenstown or Mount Cook without a reservation—there might be nowhere legal to park your van.
Even freedom camping is limited in popular spots. Use the CamperMate or Rankers app to check availability and regulations ahead of time.
Ignoring Weather Changes
The South Island weather can change in an instant. A sunny morning can turn into a stormy afternoon, especially in mountainous areas like Milford Sound or Mount Cook.
Always check the MetService app or NZTA for alerts. Some scenic roads can close due to snow, floods, or landslides.
Avoid hiking in poor weather, and be prepared to rearrange plans if needed. Flexibility is key.
Forgetting Essentials Like Gas Canisters
Gas is essential for cooking in most campervans. Make sure you have a full gas canister when you pick up your van, and bring a spare if you’re heading into remote areas.
Other common oversights:
- Forgetting toilet paper (many DOC campsites don’t provide it)
- Not bringing a USB car charger
- Running out of water without knowing where to refill
A little preparation goes a long way. Keep a checklist, and check it twice.
Top Photo Spots Along the Route
Iconic Landscape Stops
You don’t need to be a pro photographer to come home with amazing shots. Here are must-snap spots:
- Lake Tekapo & Church of the Good Shepherd: Especially stunning at sunrise or under the stars.
- Hooker Valley Track: Capture Mount Cook from multiple angles.
- That Wanaka Tree: Iconic, poetic, and always photogenic.
- Cardrona Hotel: Old-world charm in the Central Otago hills.
- Milford Sound: Take a photo from the boat’s bow or Mitre Peak Lookout.
Hidden Gems for Stunning Shots
These lesser-known spots offer fewer crowds and unique perspectives:
- Lindis Pass Viewpoint: Best at sunrise or sunset for golden hues.
- Clay Cliffs of Omarama: Rugged textures and eerie formations.
- 12 Mile Delta Campground (Queenstown): Beautiful lakefront reflections at dusk.
Keep your camera ready and your batteries charged—New Zealand’s scenery doesn’t wait.
Best Times of Day for Photography
- Golden hour: Around sunrise and sunset—soft, warm light and long shadows.
- Blue hour: The hour before sunrise and after sunset—perfect for lake and mountain shots.
- Midday: Best for capturing glacial lakes’ vivid turquoise hues.
Avoid shooting directly into harsh afternoon light unless you’re aiming for dramatic shadows.
Photography Tips for Campervan Travelers
- Bring a tripod for night and sunrise shots.
- Use manual focus for astrophotography.
- Keep a microfiber cloth handy—mist and rain are common.
- Use your van as a prop—framing it in the foreground creates that classic “van life” aesthetic.
And most importantly—don’t spend the whole trip behind the lens. Take a moment to just be in the scene.
Campervan Etiquette and Eco-Friendly Travel
Respecting Nature and Local Communities
New Zealand’s South Island is more than just a stunning landscape—it’s home to small communities, sacred Māori sites, and delicate ecosystems. As a campervan traveler, you’re a guest, so show respect. That means no blaring music in quiet areas, no parking on private land, and absolutely no littering. Always follow the “leave no trace” principle.
Drive slowly through towns, support local businesses (even if it’s just buying coffee or fuel), and be friendly. A smile and a wave go a long way in rural areas.
Also, many areas are culturally significant to Māori. Be mindful of signage and treat these places with the reverence they deserve. You’re not just exploring scenery—you’re stepping into a land full of meaning and history.
Waste Disposal and Recycling
Proper waste disposal is non-negotiable. Your campervan should come with a greywater tank (for dirty water) and possibly a blackwater tank (if you have a toilet). These must only be emptied at designated dump stations—never in nature, roadside, or regular public toilets.
You can find dump stations using apps like CamperMate or Rankers. Most towns have one, often located near petrol stations or i-SITE visitor centers.
Sort your waste as best you can. Recycling bins in New Zealand are usually well-labeled (glass, paper, plastics), but check the signs carefully—different towns have different rules.
Supporting Local Businesses
Campervan travel gives you freedom, but it shouldn’t come at the cost of the communities you pass through. Skip the big chains and eat at local cafés, buy crafts or produce from farmers markets, and book local guides for activities.
Buying local doesn’t just support the economy—it also deepens your experience with regional food, culture, and storytelling. Want a real taste of New Zealand? Chat with a vineyard owner in Central Otago or buy cheese from a small farm in Geraldine.
Staying Safe and Responsible on the Road
Van life is fun, but safety is key. Don’t drive tired. Take breaks every 2 hours and switch drivers if possible. Never rush—New Zealand’s narrow, winding roads are not meant for speeding.
Park only in legal areas. If a site is full or closed, keep moving until you find an approved place. Overnighting in random car parks or scenic lookouts is illegal and harms the reputation of all campervan travelers.
Lastly, always lock your van, especially in tourist hotspots. New Zealand is safe, but theft can happen.
Traveling responsibly means your adventure won’t just be epic—it’ll be ethical.
Conclusion – Embrace the Freedom of the South Island by Campervan
New Zealand’s South Island is a place where dreams take the wheel. In just seven days, you’ll pass through a living postcard of turquoise lakes, towering mountains, ancient fjords, and charming small towns. Traveling by campervan isn’t just about mobility—it’s about waking up to different views every day, cooking meals with million-dollar backdrops, and having the freedom to go wherever the road leads.
Whether you’re chasing waterfalls in Milford Sound, hiking under glaciers in Mount Cook, or sipping coffee beside Lake Wanaka, you’re creating a travel story that’s uniquely yours. You’ll learn to slow down, appreciate the journey, and live simply with everything you need in your van.
And with every sunrise from a new campsite and every road you turn down, you’ll feel more connected—not just to the land, but to the spirit of adventure that brought you here in the first place.
So pack your bags, fire up the van, and let the South Island guide your next unforgettable journey.
FAQs
1. Can I freedom camp anywhere in New Zealand?
No. Freedom camping is only allowed in designated areas and usually requires a self-contained vehicle. Check local council regulations and always use official camping apps to find legal spots.
2. What size campervan should I rent for two people?
A 2-berth self-contained campervan is perfect for most couples. It typically includes a bed, kitchenette, toilet, and sometimes a shower. Go for something compact for easier parking and driving.
3. Is it safe to drive on South Island roads during winter?
Yes, but with caution. Roads can be icy or snowy, especially over mountain passes like Lindis or the Crown Range. Carry snow chains and check road conditions before you drive.
4. Do I need to book campsites in advance?
In peak season (Dec–Feb), yes—especially in popular spots like Queenstown or Mount Cook. Off-season, you’ll have more flexibility, but it’s still wise to reserve holiday parks ahead of time.
5. What are the best campervan rental companies in New Zealand?
Popular choices include JUCY, Britz, Maui, Apollo, and Travellers Autobarn. Choose based on your budget, amenities, and whether the van is self-contained. Always read reviews and check for hidden fees.